How Long Does Wood Filler Take to Dry?
Wood filler drying times have started getting harder to follow with all the different products, conflicting instructions, and real-world results that don’t match what it says on the can. As someone who has used water-based filler, epoxy filler, and lacquer-based filler on projects ranging from furniture repairs to rough shop builds, I spent real time learning the ins and outs of what actually affects drying time and how to tell when the filler is genuinely ready to sand. Today, I will share it all with you.

The impatient approach to wood filler — apply it, sand it 20 minutes later regardless of conditions — is where most finishing failures start. Filler that isn’t fully cured shrinks after sanding, leaving a depression where you filled a hole. That depression shows up unmistakably under a finish, and fixing it means sanding everything back down. Getting the dry time right the first time is much faster than dealing with the consequences of not waiting.
What Actually Affects Drying Time
Humidity is the biggest variable most woodworkers underestimate. Water-based fillers cure through evaporation; high humidity slows that evaporation significantly. On a humid summer day in an unventilated shop, a water-based filler that dries in 45 minutes in winter might still be tacky at the center after 3 hours. That’s not a product failure — it’s chemistry. Temperature compounds the effect: cold slows curing, warm accelerates it. Working in a climate-controlled space above 60°F and below 75% humidity gives you predictable results that match the can’s instructions.
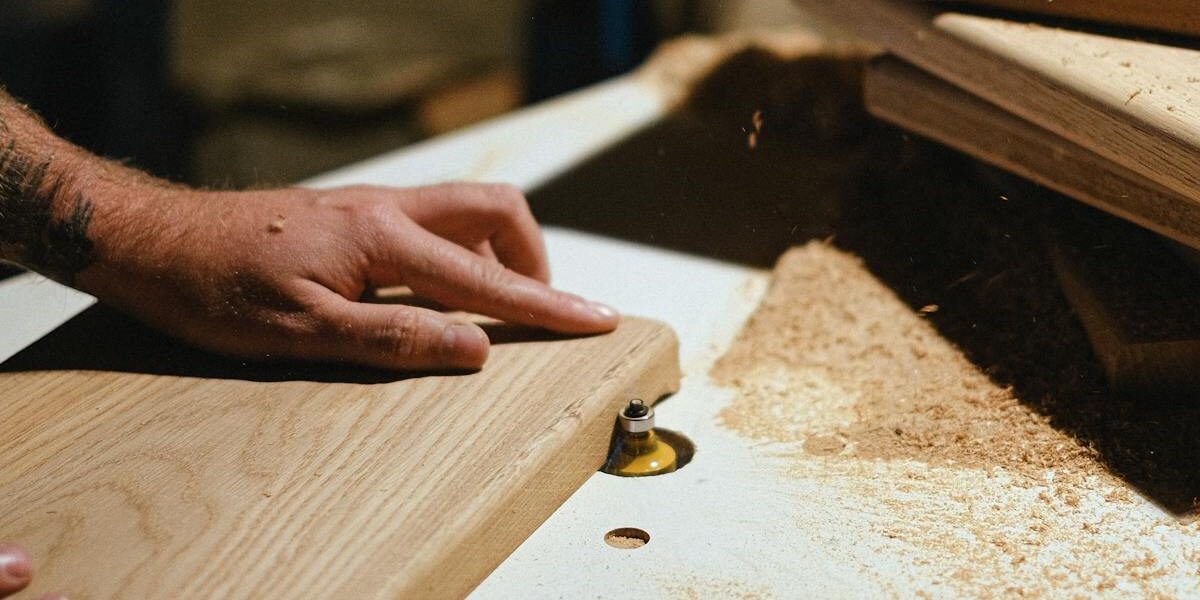
Depth of application matters more than most people realize. Filler cures from the outside surface inward, which means a thick application will be dry on the surface while still wet in the center. The manufacturer’s stated drying time assumes an application depth consistent with typical small repairs. For deep holes or gaps, fill in layers, allowing each layer to cure before adding the next. It adds time to the process but the result is actually solid rather than a cured shell over a still-soft interior.
Types of Wood Filler and Their Real-World Dry Times
Water-based fillers like Elmer’s and Timbermate are the most common for furniture and finish work. They sand cleanly, accept stain fairly well (though never as uniformly as wood), and clean up with water. Dry time in good conditions: 30 minutes to 2 hours depending on application depth. Always test by pressing with a fingernail before sanding — if it dents, it’s not ready.
Solvent-based fillers dry faster — often 15 to 30 minutes — because solvent evaporates more aggressively than water. They’re less pleasant to work with (ventilation is required) and don’t stain as evenly as water-based, but for quick repairs on painted surfaces they’re efficient.
Epoxy fillers are two-part systems that cure through a chemical reaction rather than evaporation. This makes them much less sensitive to temperature and humidity than single-component fillers, and their open time is predictable regardless of conditions. Full cure is typically 30 minutes to 2 hours depending on the product. Epoxy fillers are the right choice for structural repairs, deep fills, and outdoor applications where moisture resistance matters. They won’t shrink after curing, which makes them useful for filling large voids where other fillers would crack as they shrink.
How to Tell When Filler Is Actually Dry
Color is the first indicator. Most water-based fillers are darker when wet and lighten as they cure. Consistent color across the entire filled area — matching the color it shows when you’ve seen it dry before — is a good sign but not conclusive. Tactile test: press with a fingernail. Properly cured filler resists nail pressure without denting; if it dents at all, it needs more time. The sanding test is definitive — lightly sand a small corner of the repair. If the filler sands smoothly into a powder without balling up or gumming the sandpaper, it’s ready. Gumming means still wet. I’m apparently someone who went straight to sanding a dozen times and only shifted to the nail test after enough failures to make the point. Do the nail test.
Application Tips That Reduce Problems
Apply slightly proud of the surface — the filler will shrink as it dries, and overfilling leaves material for sanding rather than requiring a second application. Use a flexible putty knife for smooth application that reduces the sanding workload. For open-grain woods like oak and ash, press the filler in firmly with a stiff brush to get it into the grain rather than just bridging over it; a bridge will telegraph through the finish as a sunken spot.
Raw wood absorbs water from water-based filler into the surrounding grain, raising the wood fibers in a ring around the repair. That raised ring sands out, but it costs time and sometimes leaves a ghost mark under stain. A washcoat eliminates the absorption problem.


Stay in the loop
Get the latest the workshop journal updates delivered to your inbox.